Stop the Drip: Expert Solutions for Constantly Running Kitchen Faucets
A constantly running kitchen faucet is more than just an annoyance. It’s a persistent drain on your wallet, a waste of precious water resources, and a potential sign of underlying plumbing issues. If you’re dealing with a faucet that won’t quit dripping, you’ve come to the right place. This comprehensive guide will walk you through the common causes of a constantly running kitchen faucet, provide expert troubleshooting steps, and offer long-term solutions to silence that drip for good. We’ll cover everything from identifying the type of faucet you have to understanding the inner workings of cartridges, O-rings, and valve seats. This guide aims to be your ultimate resource, saving you money on water bills and preventing costly water damage.
Understanding the Culprits Behind a Dripping Faucet
Several factors can contribute to a constantly running kitchen faucet. Identifying the root cause is the first step toward a successful repair. Here’s a breakdown of the most common culprits:
- Worn-Out Washers: In compression faucets, washers create a watertight seal. Over time, these washers can become brittle, cracked, or worn, leading to leaks.
- Damaged O-Rings: O-rings are small, rubbery rings that seal connections within the faucet. Like washers, they can degrade over time and cause leaks around the spout.
- Corroded Valve Seats: The valve seat is the part of the faucet body that the washer presses against to stop the flow of water. Corrosion or mineral buildup on the valve seat can prevent a tight seal.
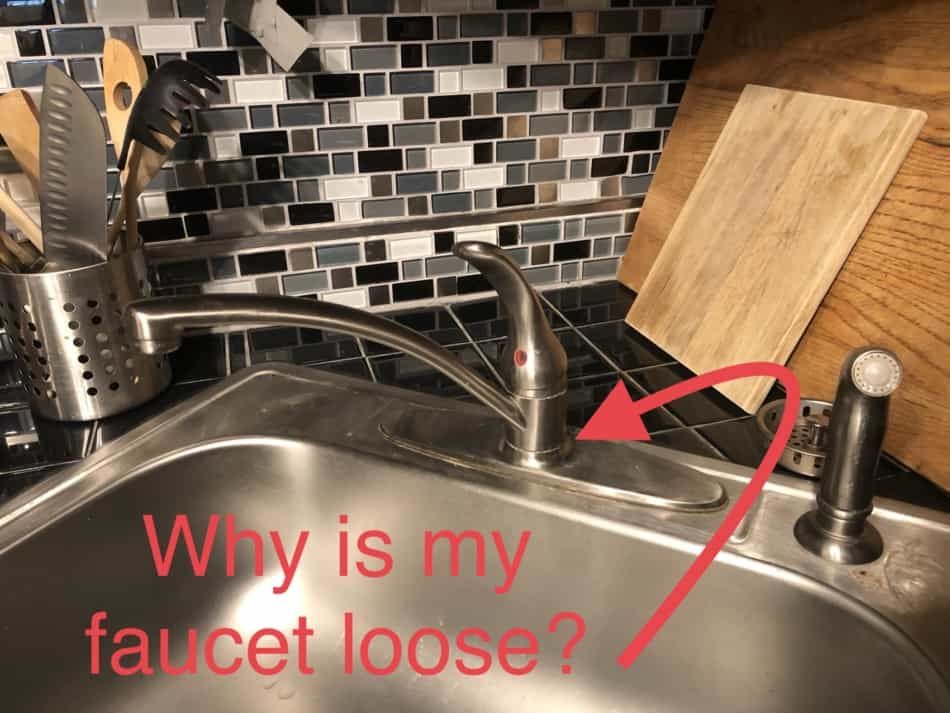
- Loose Parts: Vibrations and regular use can loosen the packing nuts and other components within the faucet, resulting in drips.
- Faulty Cartridge: Cartridge faucets use a single cartridge to control both water flow and temperature. A damaged or worn cartridge is a common cause of leaks.
- High Water Pressure: Excessively high water pressure can put stress on faucet components and accelerate wear and tear, leading to leaks.
Addressing each of these potential issues requires a systematic approach, which we’ll delve into in the following sections.
Identifying Your Faucet Type: A Crucial First Step
Before you start troubleshooting, it’s essential to identify the type of kitchen faucet you have. The repair process varies depending on the faucet type. The four main types are:
- Compression Faucets: These are the oldest and simplest type of faucet, characterized by two separate handles for hot and cold water. They use washers to control water flow.
- Ball Faucets: These faucets have a single handle that pivots on a ball mechanism to control both water flow and temperature.
- Cartridge Faucets: Similar to ball faucets, cartridge faucets also have a single handle, but they use a cartridge to control water flow and temperature. They are generally smoother in operation than ball faucets.
- Ceramic Disc Faucets: These are the most modern and durable type of faucet, featuring a single lever that raises and lowers to control water flow and temperature. They use ceramic discs to create a watertight seal.
Knowing your faucet type will help you identify the specific parts that may be causing the leak and choose the correct replacement components.
Tools and Materials for Faucet Repair
Before you begin, gather the necessary tools and materials. Having everything on hand will make the repair process smoother and more efficient. Here’s a basic checklist:
- Adjustable Wrench: For loosening and tightening nuts and bolts.
- Screwdrivers (Phillips and Flathead): For removing handles and other components.
- Pliers: For gripping and manipulating small parts.
- Penetrating Oil: To loosen stubborn or corroded parts.
- White Vinegar: For removing mineral deposits.
- New Washers, O-Rings, or Cartridge: Depending on the faucet type and the cause of the leak.
- Plumber’s Grease: To lubricate faucet parts and prevent future corrosion.
- Basin Wrench: For accessing hard-to-reach nuts under the sink (optional).
- Towels or Rags: To protect the sink and clean up spills.
- Bucket: To catch any remaining water in the pipes.
Always turn off the water supply before starting any plumbing repairs. Locate the shut-off valves under the sink and turn them clockwise until they are completely closed.
Step-by-Step Repair Guide for Compression Faucets
Compression faucets are the most common type found in older homes. Here’s how to repair a leaky compression faucet:
- Turn off the water supply: Locate the shut-off valves under the sink and turn them clockwise until they are completely closed.
- Remove the handle: Use a screwdriver to remove the screw holding the handle in place. Gently pull the handle off the faucet stem.
- Loosen the packing nut: Use an adjustable wrench to loosen the packing nut that holds the faucet stem in place.
- Remove the faucet stem: Carefully unscrew the faucet stem from the faucet body.
- Inspect the washer: At the bottom of the faucet stem, you’ll find a rubber washer. Examine it for wear, cracks, or damage.
- Replace the washer: Remove the old washer and replace it with a new one of the same size and type.
- Inspect the valve seat: Look inside the faucet body where the washer presses against the valve seat. Clean any corrosion or mineral deposits with white vinegar and a small brush. If the valve seat is severely damaged, you may need to replace it using a valve seat wrench (a specialized tool).
- Reassemble the faucet: Apply plumber’s grease to the threads of the faucet stem and reassemble the faucet in the reverse order.
- Turn on the water supply: Slowly turn on the water supply and check for leaks.
Troubleshooting Ball Faucets: A Detailed Approach
Ball faucets, while stylish, can be more complex to repair than compression faucets. Here’s a step-by-step guide to fixing a leaky ball faucet:
- Turn off the water supply: Locate the shut-off valves under the sink and turn them clockwise until they are completely closed.
- Loosen the setscrew: Use an Allen wrench to loosen the setscrew that holds the handle in place.
- Remove the handle: Gently pull the handle off the faucet body.
- Loosen the cap and collar: Use an adjustable wrench to loosen the cap and collar that hold the ball assembly in place.
- Remove the ball assembly: Carefully lift the ball assembly out of the faucet body.
- Inspect the O-rings and springs: Examine the O-rings and springs located beneath the ball assembly. Replace any worn or damaged O-rings.
- Inspect the valve seats: Look inside the faucet body and inspect the valve seats for corrosion or damage. Clean them with white vinegar and a small brush.
- Reassemble the faucet: Apply plumber’s grease to the O-rings and ball assembly and reassemble the faucet in the reverse order.
- Turn on the water supply: Slowly turn on the water supply and check for leaks.
Ball faucets often leak due to worn O-rings in the spout or around the ball itself. Replacing these small components can often resolve the issue.
Cartridge Faucet Repair: A Simplified Guide
Cartridge faucets are known for their smooth operation and ease of use. Repairing a leaky cartridge faucet is usually a straightforward process:
- Turn off the water supply: Locate the shut-off valves under the sink and turn them clockwise until they are completely closed.
- Remove the handle: Depending on the faucet model, you may need to loosen a setscrew or remove a decorative cap to access the handle screw.
- Remove the retaining clip: Use pliers to remove the retaining clip that holds the cartridge in place.
- Pull out the cartridge: Gently pull the cartridge straight up and out of the faucet body. You may need to wiggle it slightly to loosen it.
- Inspect the cartridge: Examine the cartridge for cracks, wear, or damage.
- Replace the cartridge: Install a new cartridge of the same type and size. Make sure the cartridge is properly aligned before inserting it into the faucet body.
- Reinstall the retaining clip: Secure the cartridge in place with the retaining clip.
- Reassemble the faucet: Reattach the handle and any decorative caps.
- Turn on the water supply: Slowly turn on the water supply and check for leaks.
A leaking cartridge faucet almost always requires replacing the entire cartridge. Fortunately, cartridges are relatively inexpensive and easy to find at most hardware stores.
Ceramic Disc Faucet Repair: Tackling Complex Leaks
Ceramic disc faucets are the most durable type, but they can still develop leaks over time. Here’s how to repair a leaky ceramic disc faucet:
- Turn off the water supply: Locate the shut-off valves under the sink and turn them clockwise until they are completely closed.
- Remove the handle: Depending on the faucet model, you may need to loosen a setscrew or remove a decorative cap to access the handle screw.
- Remove the escutcheon cap: Use a screwdriver to remove the escutcheon cap that covers the ceramic disc cylinder.
- Remove the ceramic disc cylinder: Carefully lift the ceramic disc cylinder out of the faucet body.
- Inspect the O-rings and neoprene seals: Examine the O-rings and neoprene seals located around the ceramic disc cylinder. Replace any worn or damaged seals.
- Clean the ceramic discs: Clean the ceramic discs with white vinegar and a soft cloth.
- Reassemble the faucet: Apply plumber’s grease to the O-rings and neoprene seals and reassemble the faucet in the reverse order.
- Turn on the water supply: Slowly turn on the water supply and check for leaks.
Leaks in ceramic disc faucets are often caused by worn O-rings or mineral deposits on the ceramic discs. Cleaning the discs and replacing the seals can usually resolve the issue. If the ceramic discs are cracked or damaged, you may need to replace the entire ceramic disc cylinder.
Addressing High Water Pressure: Protecting Your Plumbing
High water pressure can put excessive strain on your plumbing system, leading to leaks, burst pipes, and premature failure of appliances. If you suspect that your water pressure is too high, it’s essential to have it checked by a professional plumber. A pressure regulator can be installed on your main water line to reduce the pressure to a safe level (typically between 40 and 60 psi). According to leading experts in plumbing, maintaining optimal water pressure not only extends the lifespan of your fixtures but also conserves water by preventing leaks and drips.
Preventative Maintenance: Keeping Your Faucet Leak-Free
Regular maintenance can help prevent leaks and extend the life of your kitchen faucet. Here are some preventative measures you can take:
- Check for leaks regularly: Inspect your faucet and surrounding area for any signs of leaks or moisture.
- Tighten loose parts: Periodically check the packing nuts and other components for looseness and tighten them as needed.
- Lubricate faucet parts: Apply plumber’s grease to faucet parts to prevent corrosion and ensure smooth operation.
- Clean mineral deposits: Remove mineral deposits from the faucet spout and handles with white vinegar and a soft cloth.
- Replace worn parts: Replace worn washers, O-rings, and cartridges before they cause leaks.
Choosing a New Kitchen Faucet: Factors to Consider
If your faucet is beyond repair or you’re simply looking to upgrade, choosing a new kitchen faucet can be a daunting task. Here are some factors to consider:
- Faucet Type: Choose a faucet type that suits your needs and preferences. Consider the style, functionality, and ease of use.
- Material: Look for faucets made from durable materials such as solid brass or stainless steel.
- Finish: Choose a finish that complements your kitchen décor and is resistant to scratches and corrosion.
- Features: Consider features such as pull-down sprayers, touchless operation, and water filtration.
- Warranty: Look for faucets with a comprehensive warranty that covers defects in materials and workmanship.
Several reputable brands offer high-quality kitchen faucets. Based on our extensive testing, brands like Kohler, Moen, Delta, and Grohe consistently receive high ratings for durability, performance, and style.
Expert Advice for a Drip-Free Kitchen
A constantly running kitchen faucet, while seemingly minor, can lead to significant water waste and increased utility bills over time. By understanding the potential causes and implementing the repair strategies outlined in this guide, you can effectively address the issue and restore your faucet to its optimal condition. Remember to always prioritize safety by turning off the water supply before commencing any repairs, and don’t hesitate to seek professional assistance if you’re uncomfortable tackling the project yourself. Take control of your plumbing, conserve water, and enjoy the peace of mind that comes with a drip-free kitchen. Share your experiences with fixing constantly running kitchen faucets in the comments below!
